Saturday, March 31, 2012

Scavenger Hunt Sunday

The last couple of weeks, I've struggled to participate in Scavenger Hunt Sunday, but this week I've been back in the game.

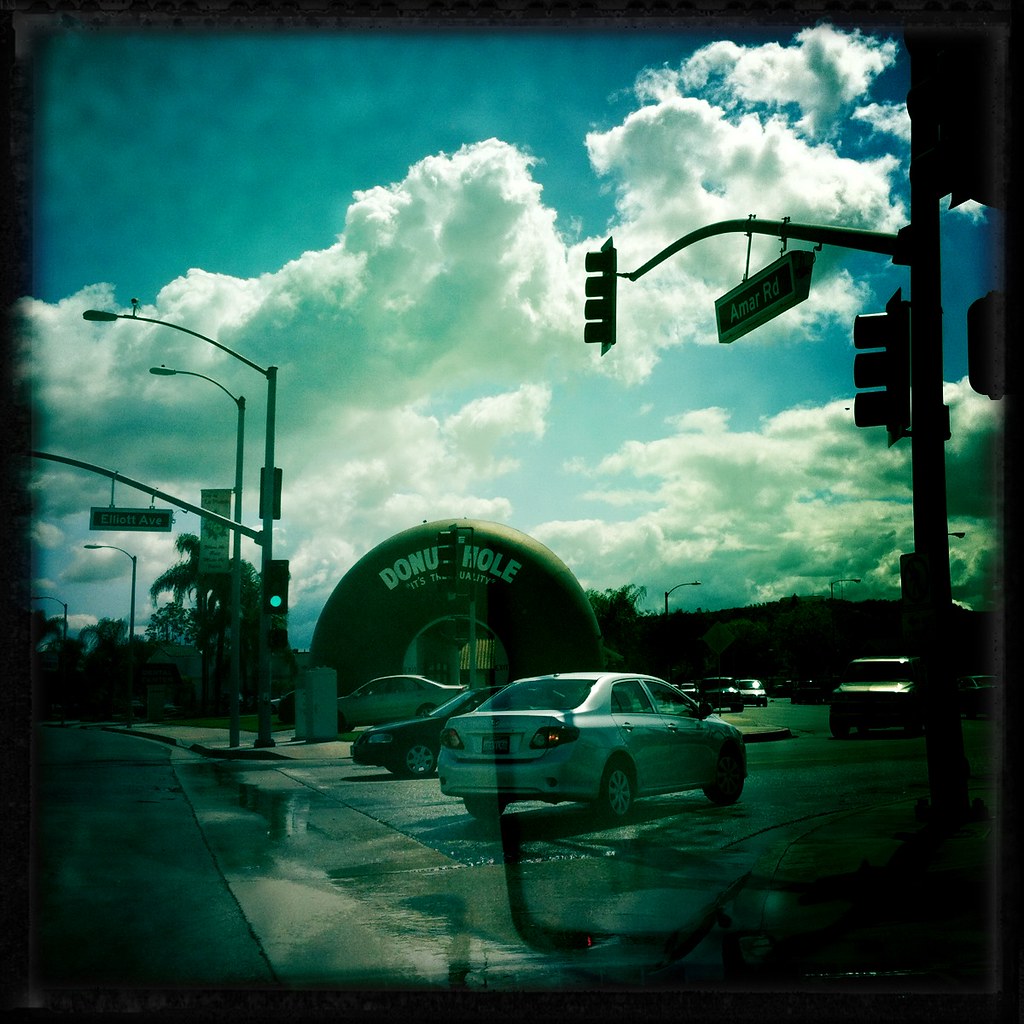
Clouds - the week was perfect for lots of cloud shots. This one was taken on Monday as I drove back home from my doctor's appointment. I love the sky after a day of rain and it had rained all day on Sunday so Monday the sky was clean and fresh and my heart was happy after getting some good news.


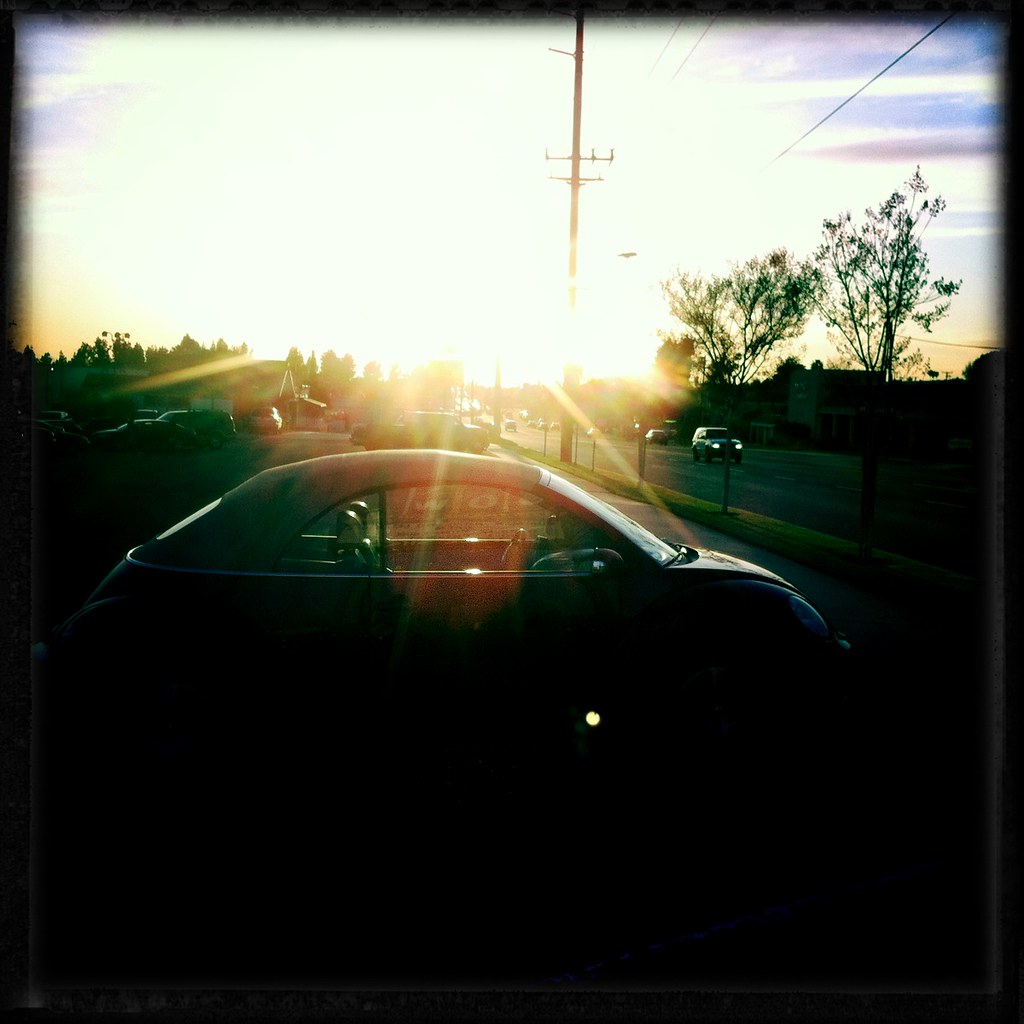
Sun flare - so hard to pick my favorite of the week, but ultimately, I loved the way the sun flare bathed my slug bug in light in this shot.


High Angle - At the train station on Friday, I climbed up to the pedestrian overpass and got this shot of the train as it started coming up the track. The power and heat of the engine as the train lumbered under the overpass was incredible


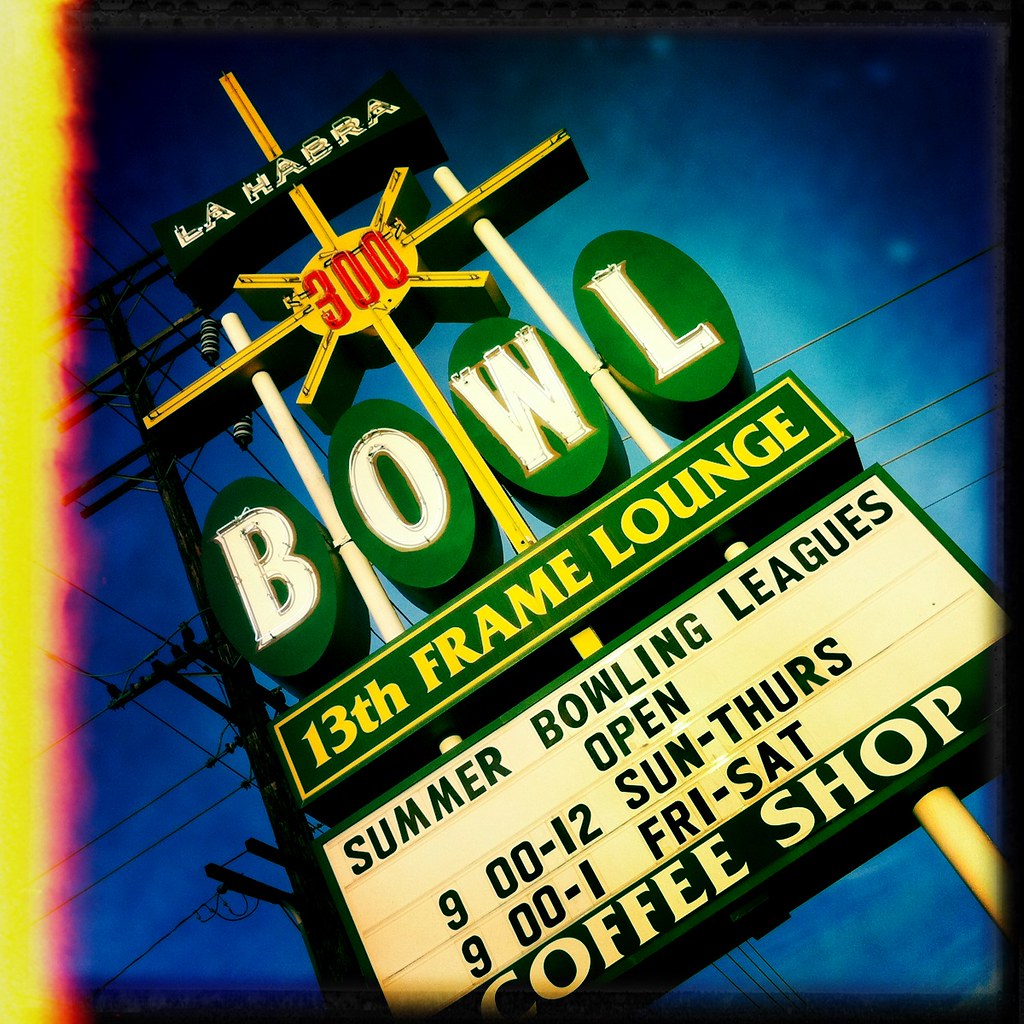
Low Angle - I've been in love with taking pictures of signs lately.


Seven - This one eluded me all week. So happy I caught this on the way home today.


It was so much fun to participate again. Next week's challenge looks like a good one, too. Click on the link to Scavenger Hunt Sunday below to see other entries and to learn more about participating.


Sunday, March 25, 2012

Step Eleven: Take Control of Your Camera

I admit it. When I first got my DSLR, I was a very intimidated. I was also frustrated. I didn't really know what to do with it. I was lucky enough to have stumbled upon some blogs that offered assistance. My advice...if you don't know where to start, start with these three little steps and then grow from there.

Take control of your ISO - I could tell you what ISO stands for, but instead I'm going to tell you what it does and why you should take control of this first. The ISO speed works with the aperture and shutter speed to get the correct exposure for your camera. In most cases, the factory default is set to Auto. This means the camera will decide the ISO setting for you. This is probably, however, the easiest control to take over, so I recommend you start with this setting. Most cameras allow you to set the ISO from 100 to 1600. Some allow a ISO as high as 3200 and some allow half f-stop settings. Without getting too technical, it's pretty easy. For good light situations, bright sunny rooms and outdoor settings, you will want to set your ISO to 100. As the light gets lower, you'll want to increase the ISO slightly until you get to the highest setting of 1600 (or 3200 if your camera allows you to set it that high).


However, every time you increase the ISO, you give up a little bit of quality as it creates "noise" or graininess in your photograph. So why wouldn't you just want to keep the ISO at 100? Because as the light gets dimmer, you need to find a way to let light into the camera to get the shot. If you don't increase the ISO, then the shutter speed needs to be longer, which means it takes longer for the shutter to snap. This increases the likelihood of a blurry picture because of camera shake, unless you get a tripod. But the nice thing about controlling your ISO is that you can eliminate the use of your camera flash giving you much better pictures because you're not washing out your subjects. You also get to decide if you want to keep the look of a low light situation especially if you just want a darker exposure so just a certain part of the picture is bathed in light. 

In the picture below, because there was a lot of sunlight coming into the room, I was able to use an ISO setting of 100.


This picture was also taken indoors, but there wasn't direct sunlight coming into the room  so I bumped the ISO up to 400. This allowed me to take the picture with a shutter speed that wasn't going to cause a blurry picture because of camera shake.


By setting my ISO to 1000 in this shot, I was able to keep the shutter speed fast enough to avoid camera shake, but still get a bit of the ambiance of the darkened room as we prepared to sing happy birthday to my nephew. You'll see, however, there is some graininess in the dark part of the picture. This is what is referred to as "noise".


Put your camera in Aperture or Shutter Priority Mode. Time to get really daring and take your camera out of auto mode and put your camera into a semi-automatic mode, generally known as aperture or shutter priority mode. In these modes you get to select the aperture or shutter speed and the camera sets the other for you.

In aperture mode, you control the aperture setting. The aperture is the opening in your lens that determines how much  light is going to get through. The aperture is identified in f-stops. The most confusing part of this all is that a f-stop of 1.8 lets more light in than a f-stop of 11. So when you hear someone say it was wide open, they mean they shot at a higher f-stop which is really a lower number. It's all so confusing, but this diagram may help:


Since a wide aperture of f/1.4 lets in more light, this means you can use a lower ISO and quicker shutter speed. The best thing about being able to control the aperture is this will allow you to control what is known as depth of field. Which means that either all of the picture will be in focus or just some of the picture will be in focus. The more light you allow in through the lens, the more shallow the depth of field will be, which means only part of photo will be in focus. The less light you allow in, the deeper the depth of field will be, which means more of the photo will be in focus (as long as there isn't camera shake). 

My helpful hint to you is not to get caught up in the technical aspect. Over time it will come to you. Just understand that the aperture will affect the depth of field. You will want to take your camera manual out to see what setting on your camera allows you to be in aperture mode and how to set the aperture. On my Canons it's AV for aperture and TV (go figure) for shutter speed. I'll promise you this, it's really not that hard to do.

With an aperture mode setting you don't need to worry about what shutter speed to work with, but you will want to understand how the aperture affects the shutter speed. With a lower aperture, you're letting less light in so you'll need a longer shutter speed, unless you bump up your ISO a bit. With a higher aperture, you're letting more light in so you need a faster shutter speed.

You'll first want to set the ISO depending on the lighting conditions and then you'll want to set the aperture depending on the lighting condition and what type of shot you want to get. Keep in mind that if it's dark, even with a high ISO, a low aperture will mean a longer shutter speed.

Here's the thing...the lens will be the determining factor as to how high of an aperture you can set. Most of the DSLR kits that come with a camera and lens don't come with a lens that lets you set the f-stop higher than 3.5. That's not the worse thing in the world, but as you learn your camera, you will ultimately want a lens that allows you to set it to at least f/2.8 or higher.

Generally when you're taking pictures of someone and you want to make sure the focus is just on one or two in the picture, you'll want to use an aperture of f/2.8. If you want everything to be in focus, an aperture of f/8 or f/11 is generally good.  

In this picture which I shot in Aperture Priority, my ISO was 100 since it was bright outside. I set the aperture to 2.8 because I wanted my mom and John to be in focus, but I wanted the background out of focus. Because the background is blurry, the green object coming out of my mom's head isn't quite as in your face as it could have been had the whole picture been in focus.


In this picture, I used an ISO of 400 and an aperture of 1.4 because I knew that I wanted the focus to be strictly on my nephew. Because the room was dark and the light was already falling, if I had used a lower ISO, the camera would have had to use a longer shutter speed which would have meant there would have been camera shake.


In the photo below, I knew I wanted the whole thing to be in focus so I shot this with a ISO 100 since it was a bright day and f/8.


If you want, you can switch your camera to shutter priority so you set the shutter speed and the camera will set the aperture. If you're taking a lot of high action pictures, you'll want to take this control. I'm not as comfortable with the shutter speed settings yet so I would recommend not listening to a word I have to say about shutter speeds. I almost always set my ISO first, then my aperture and then my shutter speed...even in manual mode.

Learn to set your focal points. If you start to shoot in Aperture Priority and you use a f-stop of 2.8 or 1.4 this means only part of your picture will be in focus and you're going to want to tell the camera what should be the part in focus...otherwise the camera is going to determine this for you which is often a bad thing. If you're using a DSLR, your camera will be set so that it finds the closest thing towards you and figures that this is the object that you want in focus. Anything on the same plane as that object will be in focus and anything in front or behind that object will be out of focus. The amount of blurring you get will be determined on the f-stop you use, the length of your lens and how far the things in front or behind your focal point are when you snap the picture. The further the other objects are from your focal point, the blurrier they will be.

One of the best pieces of advice I listened to was to take control of the camera's focal points. When you first look through your viewfinder and gently press on your camera button, you'll see the focal points, one or more which will be highlighted in red. This is your camera's way of telling you which object which it believes is the focal point of your picture. That means if you have a f-stop of 2.8, this object and other things within the same plane will be in focus. 


If this isn't the object you want in focus, then you have two options. You can take your camera, center your object, gently press down ensuring the red highlight is now on your object, quickly reframe the shot and finish pressing all the way down. The problem with this method is that you have sacrificed some sharpness when reframing the shot. And the longer it takes to reframe the shot, the more sharpness you have sacrificed.

What you can do instead, is take out your camera manual and quickly learn how to change the focal point so that if your object is to the right of the frame, you tell the camera to use that point as the focal point. 


Doing this eliminates the need to reframe your object. It does take some getting used to, but once you get the hang of it, you're in control and don't need to worry about your camera taking over and putting something else in focus. When determining where to put the focal point, you should try to have it at an eye or nose of the subject you want in focus. If there are several subjects, put at the one you want highlighted the most or on the one closest to you, keeping in mind if everyone is on the same plane, they should be in good focus, but if they're not they will be slightly out of focus.

Below are two shots of the same thing, one in which the foreground is in focus and one in which the background is in focus. In both shots, I controlled what the camera focused in on by selecting the focal point. And by controlling the focal point, I control where your eyes are drawn into the picture.


Friday, March 23, 2012

Step Ten: Study from the Best

One of the things that I find most satisfying about photography is the aspect of learning. Learning about the camera, learning about composition, learning about light and learning to challenge oneself. Everything I have learned is from blogs and books so I thought I would share the books and blogs that have taught me the most.

Books I recommend include:
  1. Understanding Exposure by Bryan Peterson - I had to read this book three times over several years before I grasped what Bryan was trying to teach me. Not because it's really difficult, but because I'm a visual person and sometimes my brain shuts down when it sounds too complicated to me. My point  is, don't give up if it doesn't come easy. But this book is a must if you want to learn more about controlling your camera and not just get lucky shots every now and then. 
  2. Photographically Speaking: A Deeper Look at Creating Stronger Images by David duChemin - This book really pushes you to become a better photographer by creating more compelling images. I haven't yet finished the book because there is a lot of food for thought complete with exercises. It's not the kind of book I can just blow through. I highly, highly recommend it if you're looking to improve the composition of your photographs.
  3. Expressive Photography: The Shutter Sisters Guide to Shooting from the Heart - This book has some good ideas for taking more inspired shots of every day living. This is a good one for anyone with any type of camera. 
  4. The Art of iPhoneography: A Guide to Mobile Creativity - This is an inspiring book which helps you to make the most of your mobile camera. It is geared for iPhone users, but with so many great Android apps, I'm sure it would be applicable regardless of the cellphone you use.
  5. Any book by Michael Freeman is also highly recommended, but I preferred David duChemin's book. He not only challenges the reader to be more thoughtful in the process, but he makes good arguments as to the reasons why and then gives you exercises to help you along the way. 
Blogs I recommend include:
  1. Karen Russell - she offers an online photography course, explaining things in such a way that I'm able to understand what she's talking about and put it into action. She was my first inspiration for wanting to take better pictures. 
  2. Erin Cobb - she offers an online photoshop and photoshop elements course and like Karen, explained things in such a way that I could understand. Erin also has a great sense of humor so I enjoy reading her blog.
  3. David duChemin - David's blog, The Pixelated Image, contains stunning images and great writing. Anyone who states that his blog is used for good and not for evil is okay by me. I love his images and his philosophy. My dream would be to take one of his workshops...in Italy.
  4. iheartfaces.com - this is a community dedicated to both professional and amateur photographers that offers photo challenges and advice from those in the business. It offers a wealth of information and resources.
  5. Shutter Sisters - another community dedicated to woman with a heart for photography. 
In step eleven, I'll share what you may want to do with your DSLR so you start getting the most out of it.

Monday, March 19, 2012

Step Nine: Edit Your Pictures

I edit all my pictures before I post them anywhere. That's not to say I edit all my pictures, but any picture I print, post to Facebook or anywhere else are edited.Well, except for my Hipstamatic pictures. These are done through the app.

Why do I edit my pictures? For the same reason I put on make up before I leave the house, to make things look better. That's not to say I'm not going to do everything I can do to get my picture as good looking as I can straight out of the camera, but I do like to add a little extra color pop. I also find that I like my pictures slightly underexposed, but I prefer to do that post production, not in camera so I also generally lighten up my exposure a bit. If I'm lucky about the only thing I'm doing is adding a little color burst because color correction and cropping just makes my work harder.

Since I'm not a professional, there are certain things I don't do. For example, I don't whiten teeth, I don't remove wrinkles and I don't put extra sparkle into eyes. I have limits to my madness. 

There are all kinds of software out there for photo-editing. I'm by no means an expert. All I can do is share  what I use, why I use it and what other alternatives I've explored. 

I currently use Photoshop Elements 10.0 which is the consumer version of Photoshop CS5. This runs in the neighborhood of $119 and usually somewhere around this time of the year Costco offers a rebate off this price so you should be able to get it for around $80 if you wait for the right time (sale!).

For years, I've wanted to upgrade to Photoshop. I was recently tempted when Adobe had a special offer to upgrade from Elements 10.0 to CS5 for only $299 (ouch, I know!), which was a $400 savings from their normal outrageous price. The price is precisely why I've never upgraded. I honestly don't feel I know enough to get my money's worth from the professional grade of Photoshop and therefore, I personally can't justify the expense right now. Even $300 to me is pretty steep because in order to maximize my investment, I would want to take some Photoshop classes. I would rather take a photography class in Venice instead. If I were a professional photographer, then Photoshop CS5 would be a must.

With Photoshop's Elements, I used to use a workflow process called Clean Color which I learned from Erin Cobb and it worked pretty well for me. However, it was time consuming based on the number of photos I was taking. If it took me just 2-3 minutes to edit a photo and I had 100 photos to edit, well that's a lot of time (5 hours!) so I started looking into purchasing Lightroom which is another product by Adobe that I heard works well for photo organization and batch photo processing. I downloaded the 30-day free trial and liked it well enough, but even that comes with a list price of $299.00. I think you can get a student version of $89.00. I guess you can say I wasn't sold. I do like that Adobe offers 30-day trials of their software. If you're considering any of their programs, try them out for free first.

Back to Clean Color for a moment, if you do have Elements or are going to get it, I still would recommend Erin Cobb's clean color class. I learned a lot in a short amount of time from her class. I'm glad I made the investment.

But recently I heard that Totally Rad, a maker of actions that I've always coveted but never bought because they only work with Photoshop created a tool called RadLab. When I heard that Radlab was designed to work not only with Photoshop, but with Photoshop Elements, too. I was giddy with excitement. They, too, offer a trial version so I downloaded the software and was hooked from the get go. I've been using this since December 2011. With it, I'm able to edit my photos faster and more consistently than before. Plus it gives me the ability to try different looks depending on how I feel. The software is $149.00, but if you try the trial version first, they'll likely offer you a 15% discount to buy it before your trial is over. I highly, highly recommend it.

If you are not sure that photo editing is for you, then I would recommend a free program called PicMonkey. They are the same designers of free software called Picnik. I never used either programs, but I have heard really good things from reliable sources for both products. From what I can see, the problem with these options is that they can be time intensive so I would only turn to this if you want to see if photo editing is for you or you only want to do it to a few of your photos at a time.

Regardless, when it comes to photo editing, I'm of the belief that less is more. You're not editing your photos to hide bad picture taking. It's not going to happen. It's the old adage...you can put lipstick on a pig, but it's still a pig.

I'm just editing my photos to give them that extra something. Also, the thing I like about editing is it allows me time to look at my pictures with a critical eye and weed the average or bad shots out. I'm not going to waste time editing a sub par photo unless there is some redeeming quality to it that makes me overlook the flaws.

Here's the workflow that works for me:
  1. I try to download my photos the night or day after I take the pictures. I generally do not delete them from my camera until later just in case something should (and sooner or later it will) happen to my computer. I don't have a sophisticated storage method. In my pictures folder, I have a subfolder for the current year. Within that subfolder is a folder for each month. I download my photos to the corresponding month and year. 
  2. When I'm ready I go through my photos one at time, deleting bad shots or excessive duplicates. Then I go through them one more time, earmarking the photos I want to share and edit. I put these into a subfolder which indicates these are to be edited. 
  3. When I'm ready, I edit my photos, putting them into another subfolder indicating these are edited files. I use the same file name, but add an extension that lets me know that I edited and what process I used to do so. I never save changes to my original photos. This is a conscious choice for two reasons:
    1. I produce my photos in jpegs and every time you save changes to a jpeg you compromise the quality of the file. I don't shoot in RAW (which is a higher quality file to edit) because I'm not a professional. I work to get decent exposure from the camera and my computer is not the fastest gun in town. RAW files are much larger than JEPGs so they take up more storage and can take longer to work with.
    2. If I should decide later that I don't like what I did when I edited the photo, I still have the original file intact to start all over again. This is also why I like to keep the edited file name with the original name at the start so that if I want to go back to the original for any reason, I know what  file name I'm looking for.
  4. I don't tag my files in Photoshop Elements. I've just never had a good system for doing so. I can usually remember the year and around the month of a photo I'm looking for and my not having tons of subfolders, I can find the pictures I want pretty quickly. Plus, it's fun to look through my old photos every once and a while.
  5. At least once a month, if not more, I'll download my photos to a service that stores photos online. There are services such as Flickr and Costco that do this for free, but there are limitations to their storage options so recently I made a decision to pay for this service through a company called SmugMug. With SmugMug you can download your full resolution files which is something you can't do with companies that don't charge. I pay $8.00 a month for this peace of mind service which I think is reasonable. By having my photos downloaded to SmugMug, I don't need to worry about my computer blowing up or getting lost or stolen. Once the photos are downloaded to SmugMug, I erase them from my camera's memory card.

I know this can seem like a lot of work so now I'm going to illustrate the reasons why I go through so much trouble with some before and after shots:

First of all, I'm a believer in cropping the crud out if it makes the photo better. It's easy thing to do, but your goal should be to eliminate this step. I used to crop over 50% of my photos when I first started editing and now I crop less than 1%. I feel like less of a faker now. And if you're working with 100 pictures, anything you can do to trim the editing time down, is that much better.

Here's a photo that I think needed a good crop. I took this picture of my nephews a few years ago in Santa Barbara. Justin had bought some confetti eggs and was egging some hapless victim (this is what you do in Santa Barbara during the holidays).  I captured this as the boys were running from the scene of the crime. 

I liked the shot, but I thought there was too much distraction in the background so I cropped it to a portrait layout instead and added just a little color pop. Now the focus is on the mischievous looks of the boys. I like this much much better.


Below is a picture I took at sunset at the beach. No cropping necessary. The top is straight out of the camera. The bottom has a little color boost. Again, not much, but I like it better.


Here's something a little different that I did recently using RadLab. The top picture is before and the bottom is after. I wouldn't necessarily want to change all my photos like this, but I think in this case, it works well.


Tomorrow, I'll be sharing some more ideas on how to improve your pictures straight out of the camera and then my last two steps will be sharing other resources that I found from real experts.


Sunday, March 18, 2012

Step Eight: Learn How to Set Your White Balance

Have you ever taken pictures at an indoor event only to get home and find that everything has an orange, grey or bluish tint? This is because the color of objects are affected by different types of lights, whether they be tungsten, fluorescent or something other than that. Our brains know how to compensate and automatically adjust how we see the objects, but cameras aren't smart enough to do that on their own. Without human intervention, most pictures taken indoors and some pictures taken outdoors will have a color cast that can ruin the picture.

I took the picture below at my brother's wedding several years ago. See how there is a greyish orange cast to the picture? That's referred to as a color cast. I took a good number of pictures during the wedding ceremony and reception and much to my dismay when I downloaded my pictures they all had this dingy color cast.


Luckily I was able to remove the color cast later, but I had to do this on each individual picture I took that evening which took a lot of time. Sometimes it's easier to remove the color cast than others. Sometimes you can't get the true colors to show through. For this reason, it's always better to eliminate the color cast in the first place by setting the custom white balance in your camera.


Learning how to control white balance was one of those things I was determined NOT to learn. I think it had something to do with the fact that I knew I needed to read my camera manual to learn how to do this and I had it in my mind that it was a hard thing to do. It could not be further from the truth. Once I finally took my camera manual out, walked through the steps one at a time (and there are only about three or four steps), I was amazed how simple it was. If there is one thing that anyone can quickly master, it's white balance.

There are fancy gizmos you can buy that will help you set your white balance, but I've found that a white sheet of paper (or in a real pinch, a white napkin or table cloth will do just fine, too) does the trick for me. You will likely need your camera manual to walk you through the steps the first one or two times. If you can find your manual, look online for it.

To give you an idea of how easy this is, below are the steps I follow when setting a custom white balance.
  1. I take a picture of something white. I usually have to set my lens to manual focus because if it's in auto-focus the lens can't find a focus point and just whirls around. I try to remember to immediately set the lens back to auto-focus. 
  2. I go to my camera menu and find Custom White Balance. The camera will automatically open the display area and the picture I just took will be displayed. I click on set.
  3. On my camera is a WB option, I select the option that looks like a flower.
  4. I'm ready to shoot away! I just don't want forget to reset the custom white balance when I use your camera again or change it back to auto white balance.
Again, there are grey cards, special lens caps, and other tools that you can buy to help set your white balance, but since I'm not a professional photographer, I'm happy enough just setting the white balance using something white when I know my pictures will be affected by a color cast.

When I taking pictures outdoors or in a house with natural light coming in, I don't worry about setting a custom white balance. I find that auto white balance in those conditions work fine enough for me.

Tomorrow I'll talk about editing photos to make them look their best.

Saturday, March 17, 2012

Step Seven: Portraiture Photography

Perhaps the reason I like candids better than portraiture is because it's easier for me to quietly watch from the sidelines and click away. The truth is, it takes a lot more skill to get decent portraits than it does to capture candids. Since I don't have this aspect nailed down, it somehow seems wrong that I offer up any advice on this aspect, but I'm going to tell you what has and hasn't worked for me because every now and then, I do okay.

The first time I did any large scale portraiture shoot was several years ago when I told my children that for Mother's Day all I wanted was for us to go to the beach so I could take some pictures of them. I don't know if I caught them at a moment of weakness or that the promise of lunch at BJ's at no cost to them on Mother's Day was appealing, but they acquiesced without any complaint. 


I had some ideas of what I wanted to do and I printed out some ideas that I had seen online as reminders to myself in the event that I lost my vision as soon as I put the camera up to my eye (which is not uncommon for me). As we finished up our desert, this voice inside my head told me to share the pictures with my family and tell them what I wanted from them once we got down by the water. It was the best thing I could have ever done. The whole time, things flowed pretty easily. I wish I could say everything has been simple ever since.  


I guess my point is this. If you do have a vision for the pictures you want to take, you have to share the vision before you start taking the photos so your subjects have some idea of what you want them to do. I'll guarantee you this...if you don't, they won't miraculously know what to do and you may end up disappointed. And if you don't have a vision? Well, you may be lucky and end up with some good shots, but I wouldn't want to count on luck every time I go out shooting. It helps to have a vision.


In addition to vision, you need to be able to be specific and look at all aspects of the shot in the frame. This is where perfection counts more than anything else. In the picture below, a good shot was ruined when I didn't notice that I was capturing part of the door in the background. 


Look at the shadows falling over the face, look at how the background is flattening out, look at the placement of your subjects in the frame, take time to determine what is going to stay in the frame and what will be outside of the frame.


As you get flowing and the trust builds between you and your subjects, you'll find that things naturally flow from one thing to another. My biggest problem is that I have a hard time directing everyone and I'm not good at recommending poses. I'm trying to take more control than I have in the past. Sometimes it's easier than others.

If we're outdoors, one of the best tricks that I've learned is having your subject(s) walk towards you. 


When trying this out, stand as far back as you can as because usually when they start walking towards you the first few steps are likely going to be awkward, but the more steps they take, the more natural the shots you get because somewhere along the way, they start laughing about the whole thing.


This is one of my go to, works every time, tricks. 


You just have to make sure to remember to keep adjusting the camera down so you don't cut your subjects at the ankles, ruining an otherwise perfect good shot.


When shooting group shots try as much as possible to mix things up. Instead of your typically, facing the camera, think of new ways to capture everyone. 


If something isn't working, let it go and move on. There is a lovely brick bridge off the freeway on the way to my brother's house. As soon as I saw it, I knew I wanted to take some pictures there and one evening Brie agreed to go with me. 


What I wasn't prepared for was the amount of traffic whizzing by in the evening hour. Brie's attitude quickly began to change especially when several cars honked at us. I had to let go of the ideas I had because she was so uncomfortable. We ended up going to downtown Vicksburg and had a good time taking pictures there.


Have tried and true things to pull out of your back pocket. If a person or persons can't relax, have them make faces at the camera. Sometimes that works, but there are times this can backfire if there are little children involved. Sometimes just talking to them about how great they are doing (even if they're not) can help get them to relax.


In the end, I think I've learned that it takes a LOT of practice to get good portraits go out as often as you can to hone this skill.

Friday, March 16, 2012

Step Six: Capturing Good Candids

There is nothing I love better than capturing a good candid shot, one in which the interaction between my subjects is real and genuine because they either don't know or have forgotten that the camera is upon them.

It can be hard to do sometimes because:

  1. People tend to change their demeanor and/or tense up their face the minute a camera is pointed their way. I'm not judging here. I'm the same way. I'm just stating simple facts.
  2. Some (who shall not be named...MATT) don't like having their picture taken no matter how inconspicuously you try to hide the camera and thwart your efforts by throwing their hand(s) up in their face or make frowny faces showing their displeasure.
  3. Others can't stop hamming for the camera and immediately go into their "camera pose".
How do I get around this? First of all, I try to have my camera in ready mode if I'm at a place or time where I know I may want to get some pictures. One of the best pieces of advice that I received about candids was from a class I took with Karen Russell. Her DSLR is always left "on" and her lens cap is always left "off". This ensures that as long as your camera is within hands reach, you'll be close to ready. With point and shoot camera's this is harder to do because they automatically turn off after a certain length of time with no activity and the lens doesn't generally have the reach needed to be unobtrusive. 

I might point the camera in a direction in which I can get the settings close to correct before I turn it to ones I want to photograph. By doing this hopefully they won't have time to notice me or react before I get some shots in. Here we were at the Louvre as I spotted the girls showing each other pictures they had taken. I pretended to be interested in a piece of priceless artwork and then turned my camera to them to take a couple of shots. I would have liked to have the aperature opened up a bit more, but sometimes time isn't a luxury to get everything perfect. And that's okay.


Second, depending on the circumstance, I use as long of a lens as I can to keep as much distance between me and the ones I'm capturing. In this photo below, I used a telephoto lens to capture a tender moment between my sister-in-law and her sweet niece. The shot is nice and tight yet I was far enough away that they never even noticed me.


Remember, too, that a picture doesn't have to have people looking into the camera to be a good picture. In the picture below, it's the interaction between Brie and Max that I love so much about the shot. It wouldn't have the same emotion if they were both looking at the camera. 


If I can't do that, I act normal when I bring the camera up and if necessary, I carry on a normal conversation with my subjects or someone else as I snap away. If they stop and pose, I may take a few pictures and then I'll either put the camera down for a few and try again. 


Finally, shoot, shoot and shoot some more. With candid shots, I find that I do need to take a fair number of shots because you don't have a subject matter frozen. 


I also try to use a wider aperture so I can blur out more of the background since I'm not in control of the 
surroundings. I rarely shoot in manual mode when shooting candids because often times it's a challenge to get the shot so I'd rather be in aperture or priority mode so there is just one control I'm worried about.


With candids, I'm not so critical of my imperfections because, again, for me they are about the moments and if I can get the shot with the feeling that it was not about the camera (or the awareness of it), I'm happy. 

If there were one thing that I wish I could do better with candids, it would be move around more. I tend to get a lot of back of the heads or off to one side angles because I'm hesitant to move around a lot. That's one of the things, I'm working on improving this year. You'll notice that I do tend to fill the frame with my subjects in most of my candids. This is because I'm trying to eliminate the "noisy" or distracting background and put the focus on what's going on with the subject or between the subjects. If I can't get close enough to do that with the lens or camera, I don't hesitate to crop out as much of the distractions as I can after I download my photos.

After portraits, I'll talk about editing and what I do to get the best photo, post camera.

Wednesday, March 14, 2012

Step Five: Learning to See the Light


In fairness of full disclosure, I have NOT mastered the light, but I'm finally getting closer. For some reason, it scared me. It's like a secret language which I didn't understand and didn't speak. So I stayed away from learning about the light. It took reading several books (good resources will be a later step) more than once, taking lots and lots of really bad pictures. Now that I'm seeing it, I'm getting better shots more often.

I'm not going to be talking about ambient light, soft light, direct light, etc because I don't feel qualified...yet. So one might ask oneself, then why have a step about learning to see the light? Because learning to see the light turns a good shot into an outstanding one. Because learning to see the light helps you consistently get better pictures. Because learning to see the light prevents you from taking pictures with harsh, unbecoming shadows casting over your subject's face.

Here are some basics that I've learned that have helped me out. 

1. If you're outdoors and everyone is squinting, the sun is your enemy. Luckily, there are usually things you can do to still get decent shots. If there is a large enough pocket of shade, pull your subjects to the shade, facing out and as close to the edge so that there aren't any harsh shadows falling onto their faces and they aren't squinting. If that's not possible, turn them and turn yourself so that they aren't looking into the sun and the shadows aren't falling harshly upon their face. If that's not possible, try to use something to create your own shade.

The pictures below were taken at the park during the mid-day sun. The first shot was taken in the shade, but there were still enough speckles of light coming in detracting from the picture. The second shot was taken in full shade which looks much better.


2. Plan to have your shoots at the golden hour. The first couple of times I drug my kids out to the beach to take pictures we arrived at the sand around noon. We could not have been out there at a worst time (had to feed the flock first to guarantee smiles on the faces). Luckily for me, there was a cloud cast each time which worked in my favor. To prevent the need of luck on your side, if you're going out specifically to take photos, plan to take your pictures one to two hours before sunset (or one to two hours after sunrise, if you're so inclined). You'll not only be able to avoid the harsh, unbecoming shadows, but you'll also get a beautiful soft glow upon your photos.

Taking pictures at the optimal sunshine time will give your subject a nice halo effect or an all around nice glow. The two pictures below show you the effect of shooting at mid-day vs the golden hour. I know it's not always possible to only schedule trips around the golden hour (hence the first shot), but if you have that luxury, do it.


3. As you learn, don't be afraid to shoot into the sun. You'll want to have a camera in which you can control the exposure so you determine whether the subject is a silhouette or whether the background is blown out a bit.


4. If you're taking pictures inside, you're better off using available lighting instead of the camera flash unless you have off-camera flash that you know how to use. There is a reason that  professional photographers don't use the on-camera flash. The flash on your camera just gives your subjects red eyes, washes the subject out and often leads to that deer in the headlight look. If you need more indoor light, you'll want to move the subject closer to light or bring another light source to the subject. If you place the light correctly (off to one side), you'll get a nice shadow that gives dimension to your subject, commonly referred to as Rembrandt lighting.

In the picture below, we were in a lovely hotel lobby protected from the heat of a July mid-day in the desert. Originally we were seated in the center of the lobby where the light was flat. When the spot near the window opened up, I asked my family to move to the sofa and I was able to capture good light (don't look at the part where I cut off Matt's hand and Max's foot, we're talking about light here).


5. If possible, bump up the ISO on your camera to get great night or indoor shots that don't lose the ambiance of the event. The higher the ISO the grainier the shot will be so a good tripod will come in handy. Regardless, a flash would have whitewashed my daughter's face and made it seem like the lights were on as we sang happy birthday.


6. Practice. Practice. Practice.